Model Designer Reference
The model designer can be accessed by going to theLucyapp and then clicking on theicon and selecting Create New Model from the menu. Alternatively, you can search for an existing model and click it to open it up in the model designer.
The Model Designer is where you design, test and deploy your models. It has a visual interface for building your action sequences, defining your attributes and testing and debugging them.
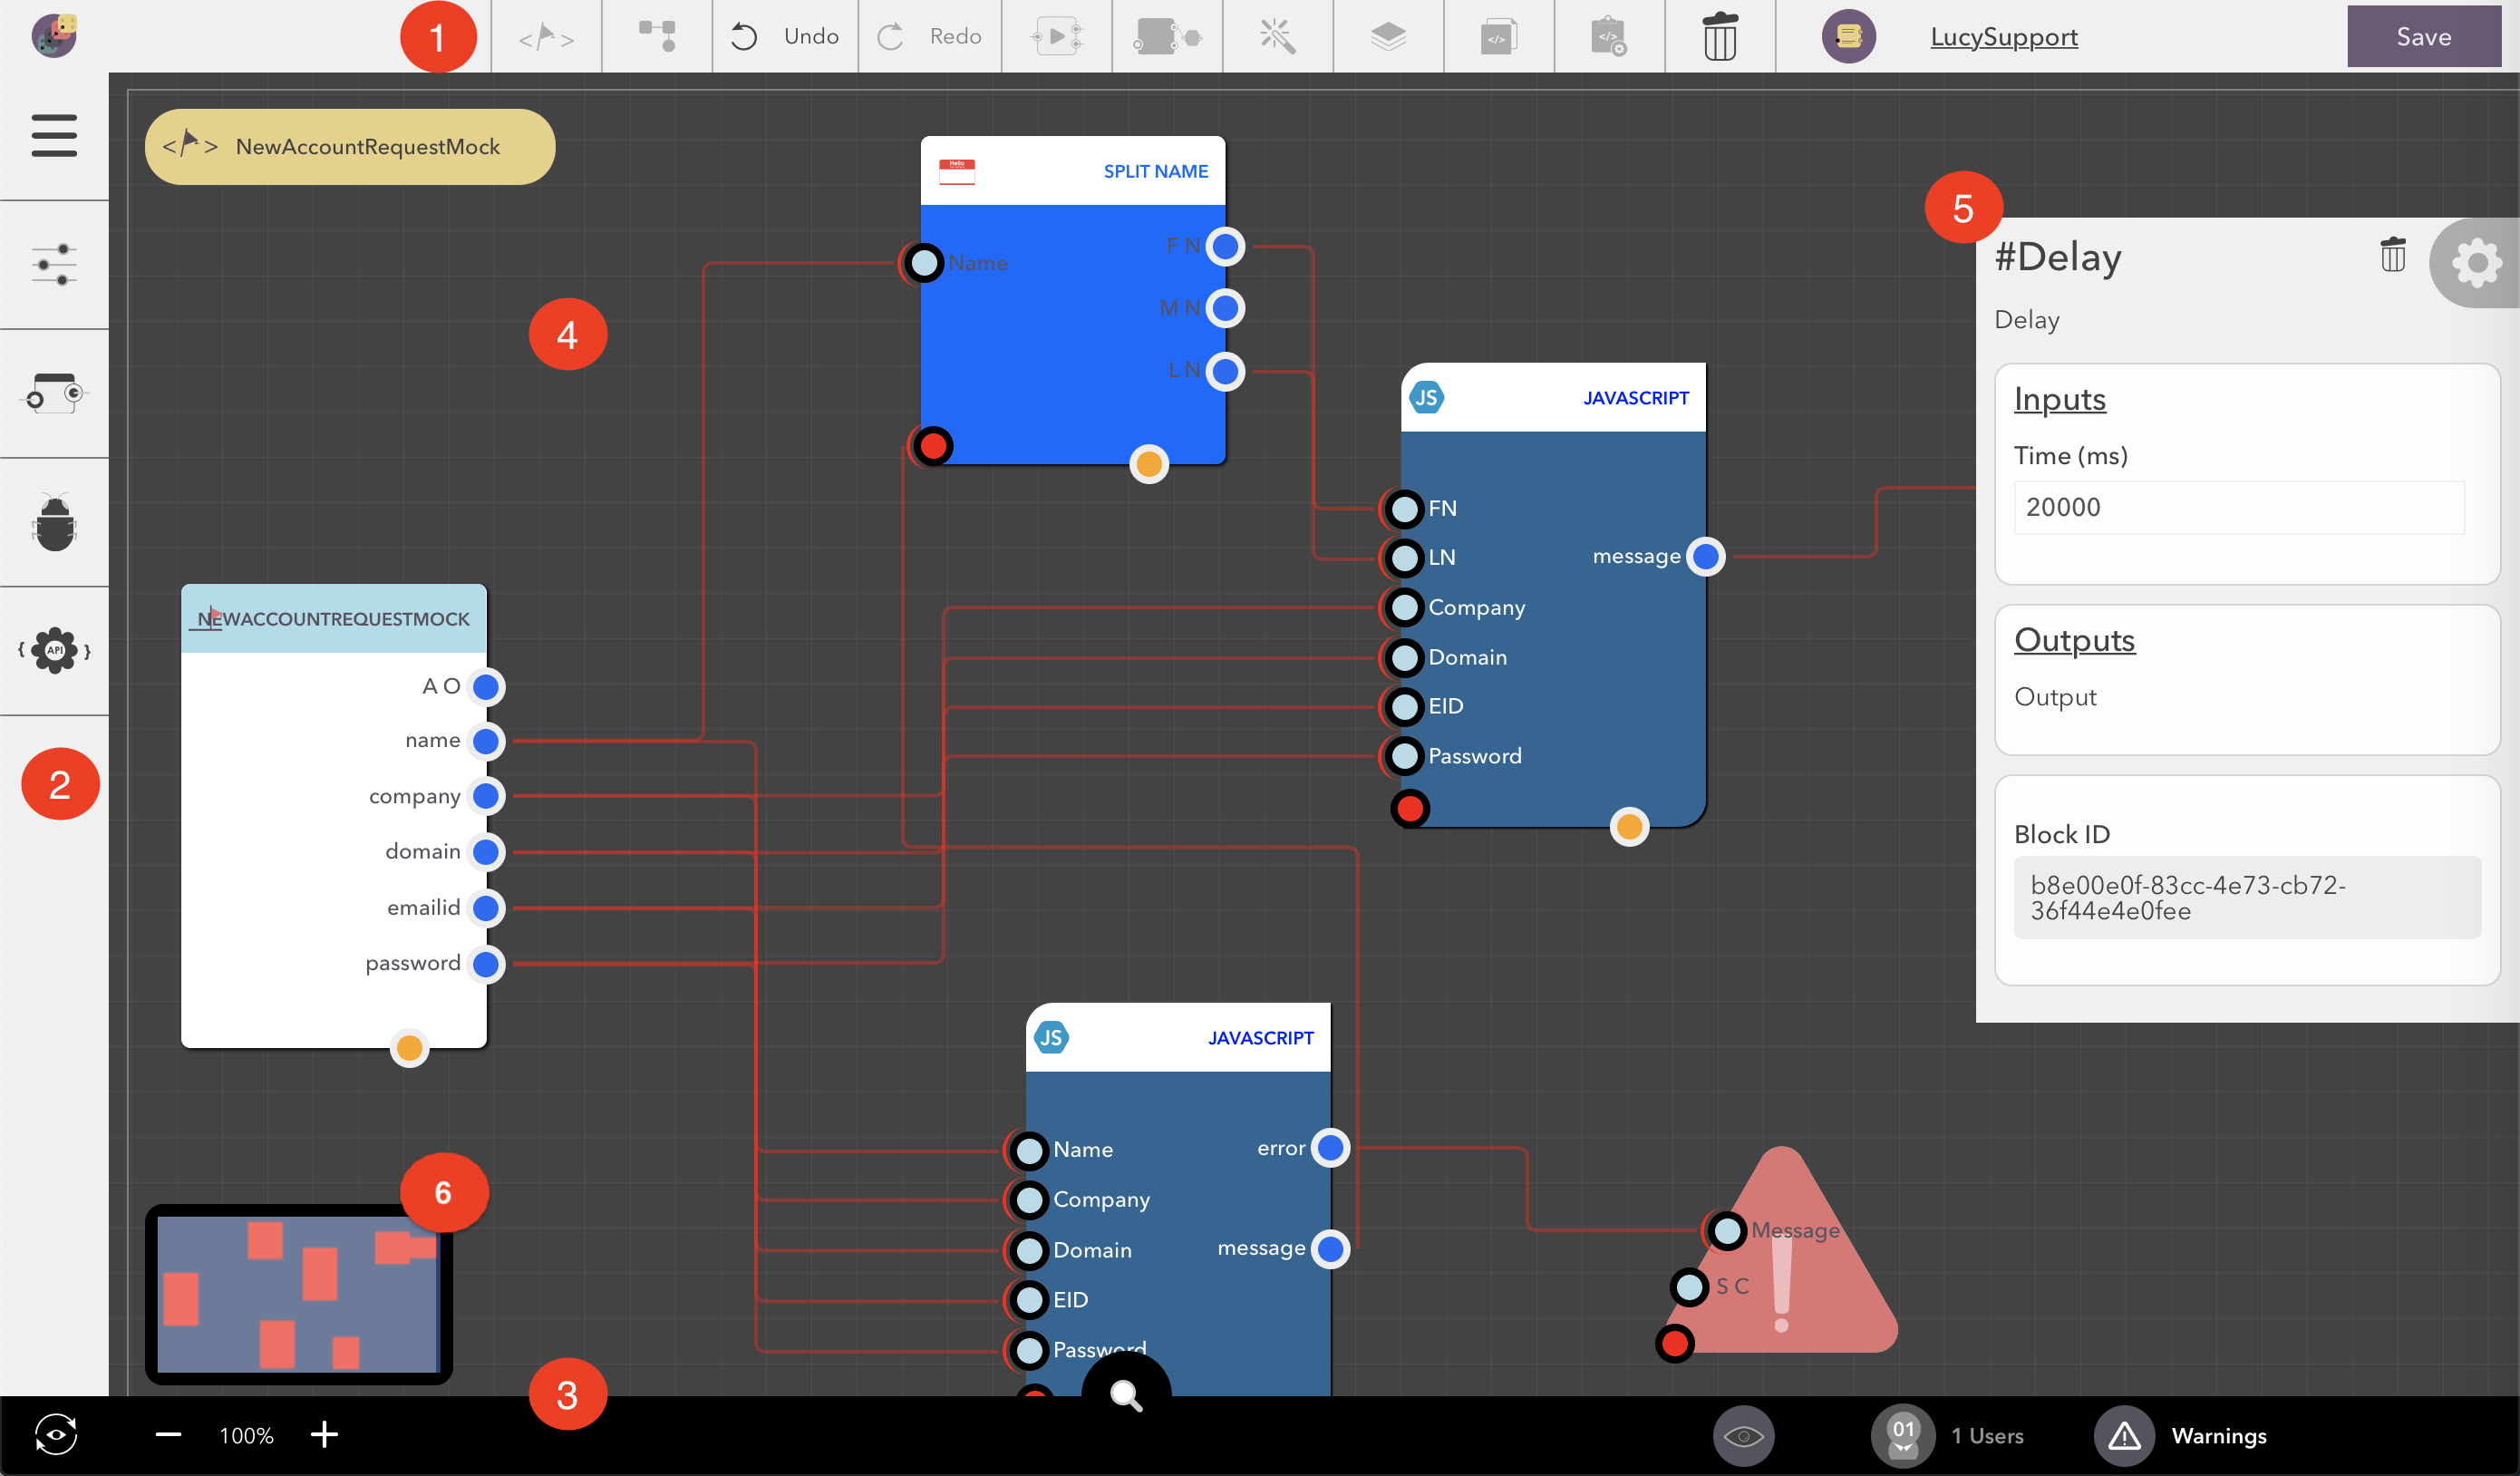
It consists of the following parts:
- Toolbar - This section contains tools for use in manipulating your Lucy model and navigating it.
- Side Bar - This section contains various panels for configuring your model
- Status Bar - This section has peripheral functionality like accessing older versions of your model, seeing who else is editing as well as warnings and errors
- Staging Area - This is where you visually construct your action sequences.
- Property Panel - Properties about the block currently selected in the staging area are shown here.
- Mini Map - An birds-eye view of your action sequence
Toolbar
This section contains controls for taking actions on the model, navigating it and doing basic editing tasks.

The following functions are available:
- Action Switcher - Use this to switch to a different action sequence or to create a new sequence
Model Actions - This brings up a menu of actions that you can take on the model
- Copy this model - Make a copy of the current model
- Create New Instance - Used to create a new model instance - you will get a dialog where you can fill in attribute values for the instance that will be created
- Bulk Load Data - This will take you to a screen where you can upload an excel sheet of data to be bulk loaded. See Bulk Loading Data for more information about this.
- Export Model - This will take you to a screen where you can export this model as well as any dependencies it has. See Importing and Exporting Models for more information.
- Make Inactive - Mark the current model as ‘inactive’. Once a model is inactive it will no longer appear in the model search page by default. Actions on the model will not execute and events it listens to will not be picked up.
- Deactivate all Instances - This will deactivate all instances of the model. Do not do this lightly! Use this only if have made massive changes to your model and it invalidates the behaviour of all instances that were created.
Undo/Redo - Use this to undo/redo any changes you make to your model. Multi-level undo and redo is supported.
Execute Action - Use this to test the currently selected action sequence. See Execution Panel for more information.
Arrange Blocks - This tool will auto arrange the blocks in the current action sequence to lay it out in an ordered sequence. Note that sometimes the sequence it selects may not be to your liking. You can always undo the changne to bring back any arrangement of blocks that you manually did.
Select All - This will select all blocks in the current action sequence.
Duplicate - Use this block to duplicate the currently selected block (or blocks if multiple blocks were selected). Note that you can’t duplicate the starting block in a action sequence. If you attempt to duplicate it, you will be asked if you want to duplicate the entire action sequence.
Copy - Used to copy the currently selecetd blocks to the clipboard. When you press the button, you will get a text box where the block definitions are copied. Hit the Copy button in there to copy that text to the clipboard.
Paste - Paste block definitions into the staging area. When you press the button, you will get a text box where you can paste in a block definition (one that was obtained by using the Copy command). Paste in the definition and hit the ‘Paste’ button to paste the blocks into the current action sequence.
- Icon Picker - You can assign an icon to your model from a preset list of icons. Click the icon to change it.
- Basic Details - This shows you the name of your model. Click it to open the Basic Details panel. In that panel you can edit the name and description of your model.
- Save - Save your current changes. Everytime you make changes and save it, a new version of your model is created and the older versions are made accessible from the Version History.
Execution Panel
Use the execution panel to test your action sequence.
You can invoke it from the toolbar.
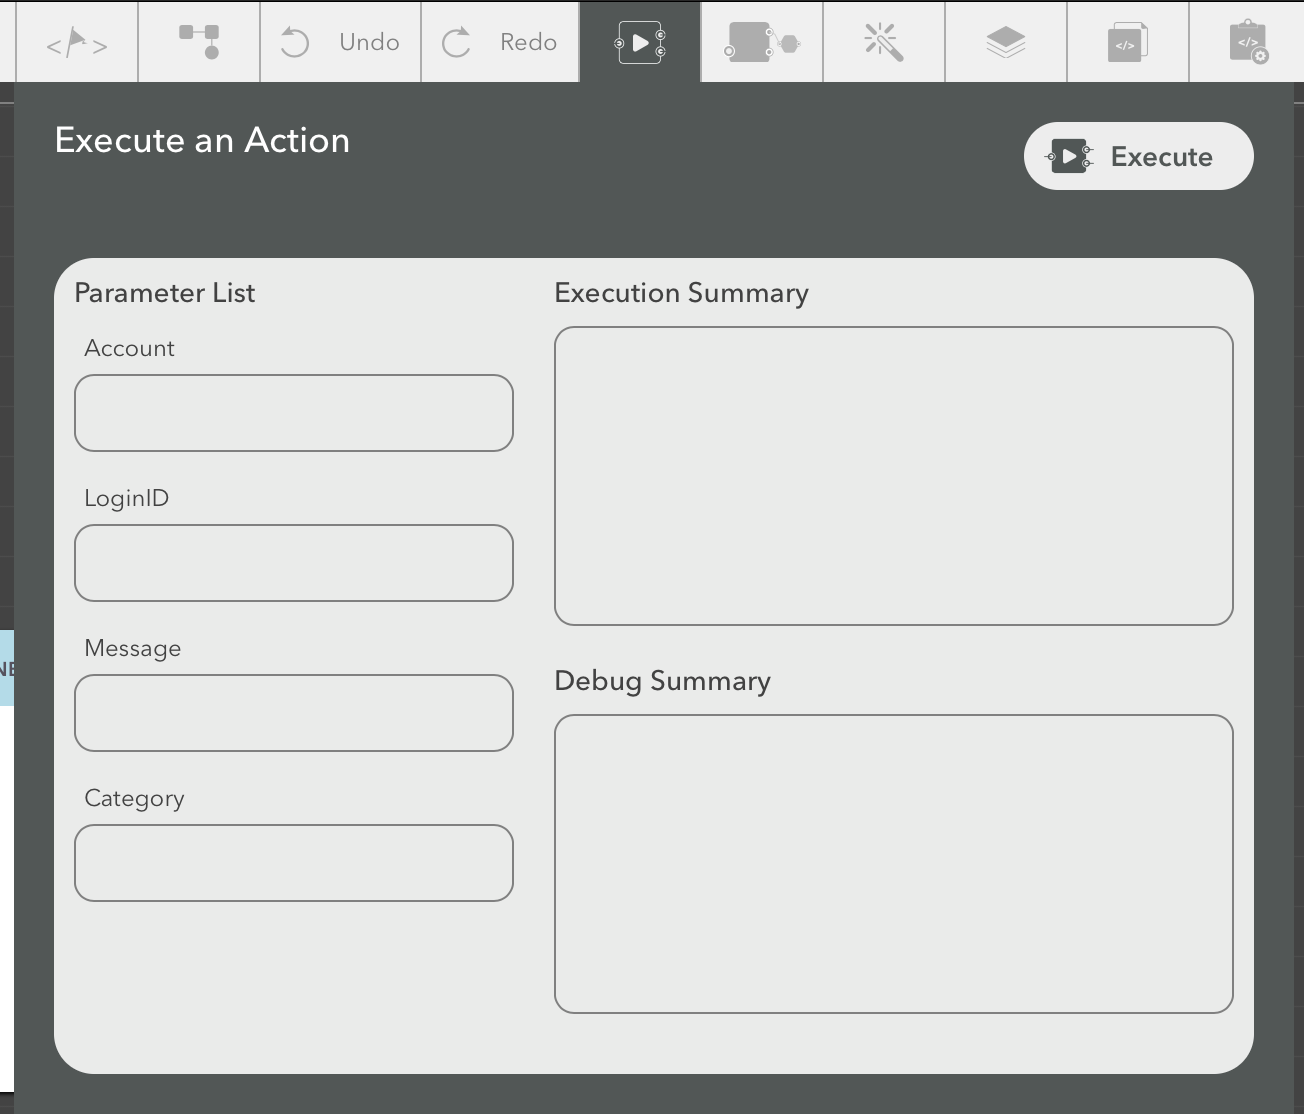
In the panel, the left side shows you a list of inputs that the current action sequence expects. You can enter values for it and use the Execute button on the right ot execute your sequence.
On the right side, the ExecutionSummary section will show you the output (if any) of your action sequence. If the execution ended in an error, the error will be shown there.
The DebugSummary section below shows any additional debug information about the execution. This includes:
- The output of any |debugblocks| in your flow
- Any warnings from Lucy about the execution of your action sequence
Attribute Editor
This is where you can add, edit and remove Attributes to your model.
To access it, click the  icon in the left side of the screen.
This will switch to the Attribute Editor
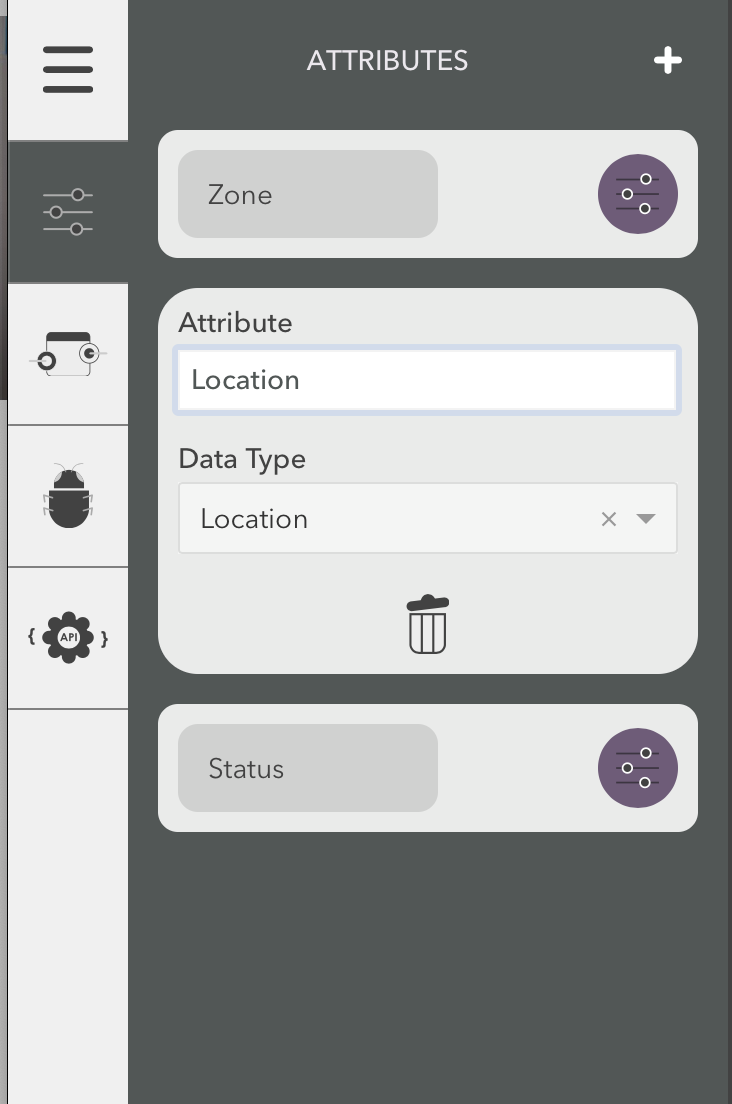
Click on the  at the top of the editor to add a new attribute to the list.
Each item in the list shows the attribute name.
Click the attribute to expand it and show more details.
at the top of the editor to add a new attribute to the list.
Each item in the list shows the attribute name.
Click the attribute to expand it and show more details.
You can change the name of an attribute by just entering new text into the ‘Attribute’ field.
Attribute names can only be alphanumeric and cannot contain any special punctuation. (The attribute editor does validate against these requirements)
Warning
Changing attribute names can cause problems if you have any action sequences or datasources that refer to the old attribute name. For example, if you used an attribute get or set block in your workflow and then change the name of the attribute, you may have to delete and add those get/set blocks again.
You can change the type of the attribute by selecting a new type from the list. The list shows the basic types:
- Text
- DateTime
as well as other objects and models defined in the system.
Warning
Changing the type of an attribute after you have deployed your model and started using it can have unintended side effects if you don’t update your action sequences accordingly. Futhermore, any other models that directly refer to this attribute will be affected as well. This is especially true of attributes that refer to other objects or models. Please change the attribute data types with care!
There are also icons that can be dragged into the action sequence design area to create blocks that can read or write to the attribute.
When you define an attribute, two blocks are automatically made available in the block panel.
- Get Value - Used to read this attributes value from the current instance
- Set Value- Used to write this attribute’s value in the current instance
These blocks are under the category ‘Attributes’ in the block panel.
Note
In previous versions of Lucy, the Attribute Editor itself had icons to drag into the staging area for reading and writing values. That is no longer there. All blocks are available in the block panel for consistency.
To delete an attribute, expand the attribute by selecting it, then click the  icon at the bottom to delete it.
See also
Debugger
The debugger lets you see a history of all actions and events that have triggered on the model and lets you step through them. See the Testing and Debugging section for more information.
Errors and Warnings Panel
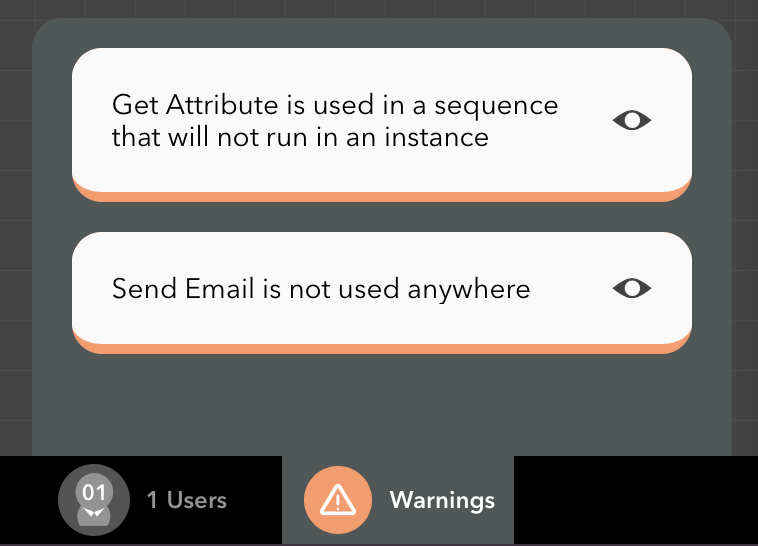
This panel, located in the status bar, highlights any potential problems with your model. The panel is constantly updated as you work with your model, checking for potential issues and showing them as messages in the panel.
If there are any errors in your model, the icon in the status bar will highlight in orange.
You can click on each warning or error and jump to the specific block or area which is causing the issue.
Tip
Try and keep this panel empty while designing your models to make sure you don’t run into any problems
Concurrent Users Panel
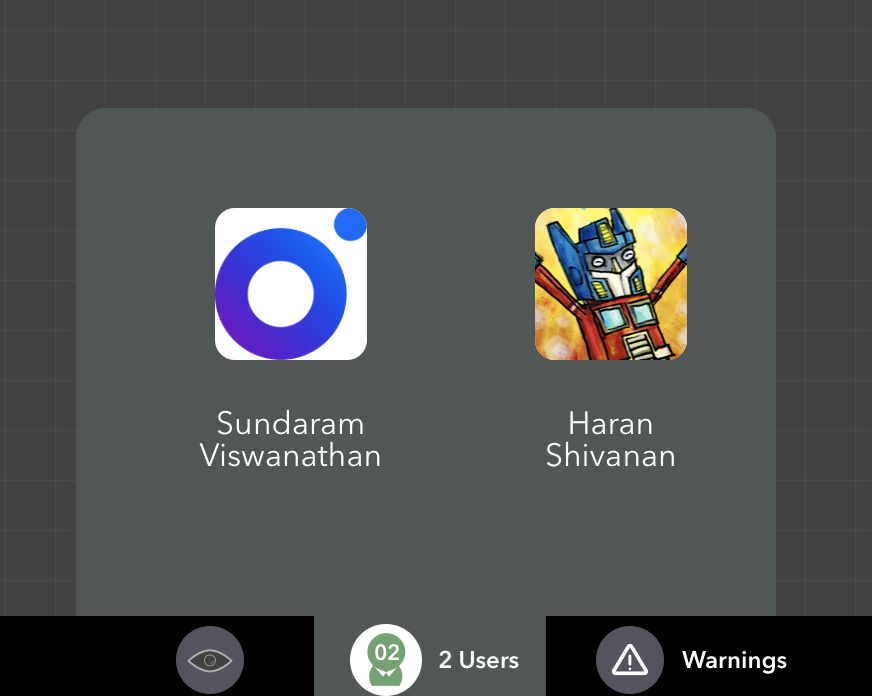
This panel, located in the status bar, shows you who else is currently viewing or editing the current model. It’s often the case that multiple people may be looking at the same model at the same time. This will help you prevent several people from trying to modify and save the model at the same time.
Note
Note that each version of the model that gets saved is recorded in the version history so you can always go back to it any point. See Version History for more information.
Properties Panel
The properties panel appears whenever a block is selected. Here, you can view and edit properties of the block including:
- Any fields required by the block
- Specify hard-coded values for any inputs
- If the block allows it, add/remove inputs or outputs
- Delete the block.
Click the icon to delete a block.
If you have selected the starting block of an action you can rename the action from this properties panel.
Staging Area
The Staging Area is where you build all the logical sequences of your model.
The area is a large surface on which you can visually construct all the logical sequences of your model.
All your logic sequences have to begin with a triggering block.
There are currently two types of triggers available:
- Action Start - These trigger when an action is explicitly called on your model. These sequences can use Output blocks to return data to the caller.
- Event Start - These get triggered when an event is raised in the system. Your model can listen to specific events and have them trigger action sequences
You can add new action sequences by using the action switcher and then adding a new one from the sheet.
Block List
The block list is located on the sidebar panel. It contains the full library of available blocks that can be used in your action sequence.
Blocks are grouped under categories, so you first see a list of categories.
Click on any to expand it and show the blocks within it.
You can either click the icon or drag the block into the staging area to add it to your workflow.
You can also search for blocks by name or category using the search box on top. Click the Back arrow to go back to the cateogry list.
The blocks in this list include:
- The standard blocks that come with Lucy
- Any external connectors that you define.
- Any actions that you have published
- Any blocks published from an external connector
API Routes
The API Routes panel is accessible from the sidebar and lets you publish and manage API end points for your model. See Publishing an API to learn more about how to publish APIs.
Search Panel
Bring up the search panel from the bottom center of the screen. Use the search panel to locate any block within your model. This is useful to find places where you have referenced some other model or some piece of code. Search is done against block titles as well as in some cases, properties of the block. For example, the javascript blocks will search within the code. And for action blocks, within the model name and action name.
Version History
Lucy maintains a full version history of your model. Everytime you save your model - if any change was done to it, a new version will be created. From the version history panel, located at the bottom status bar, you can bring up list of all versions of your model. You can also see who created that version and when it was created.
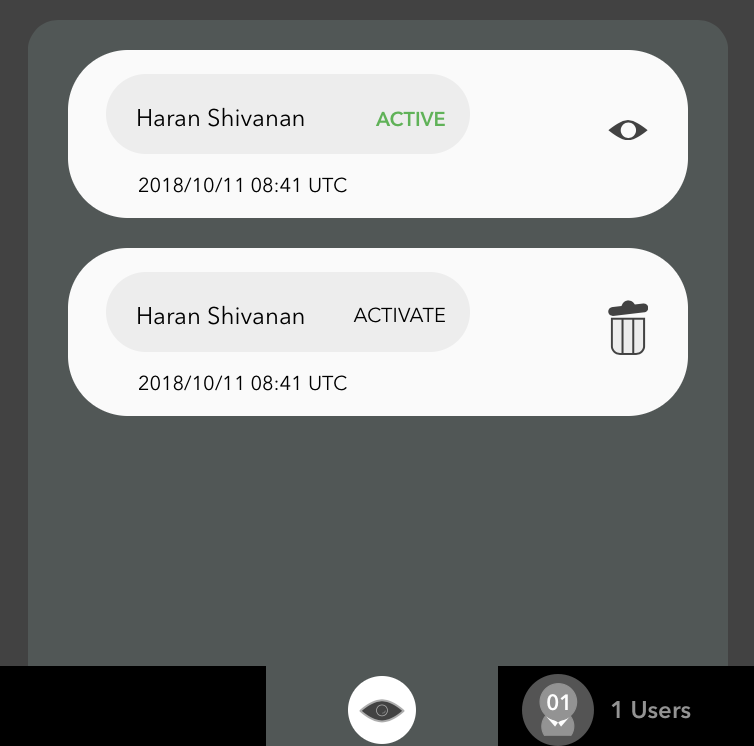
The active version will be marked as ‘active’.
You can revert back to any previous version by clicking the ‘Activate’ link next to any version.
You can also use the icon to delete a past version of the model - though you really shouldn’t need to ever do this.
Permissions Section
This can be invoked from the main menu in the sidebar.
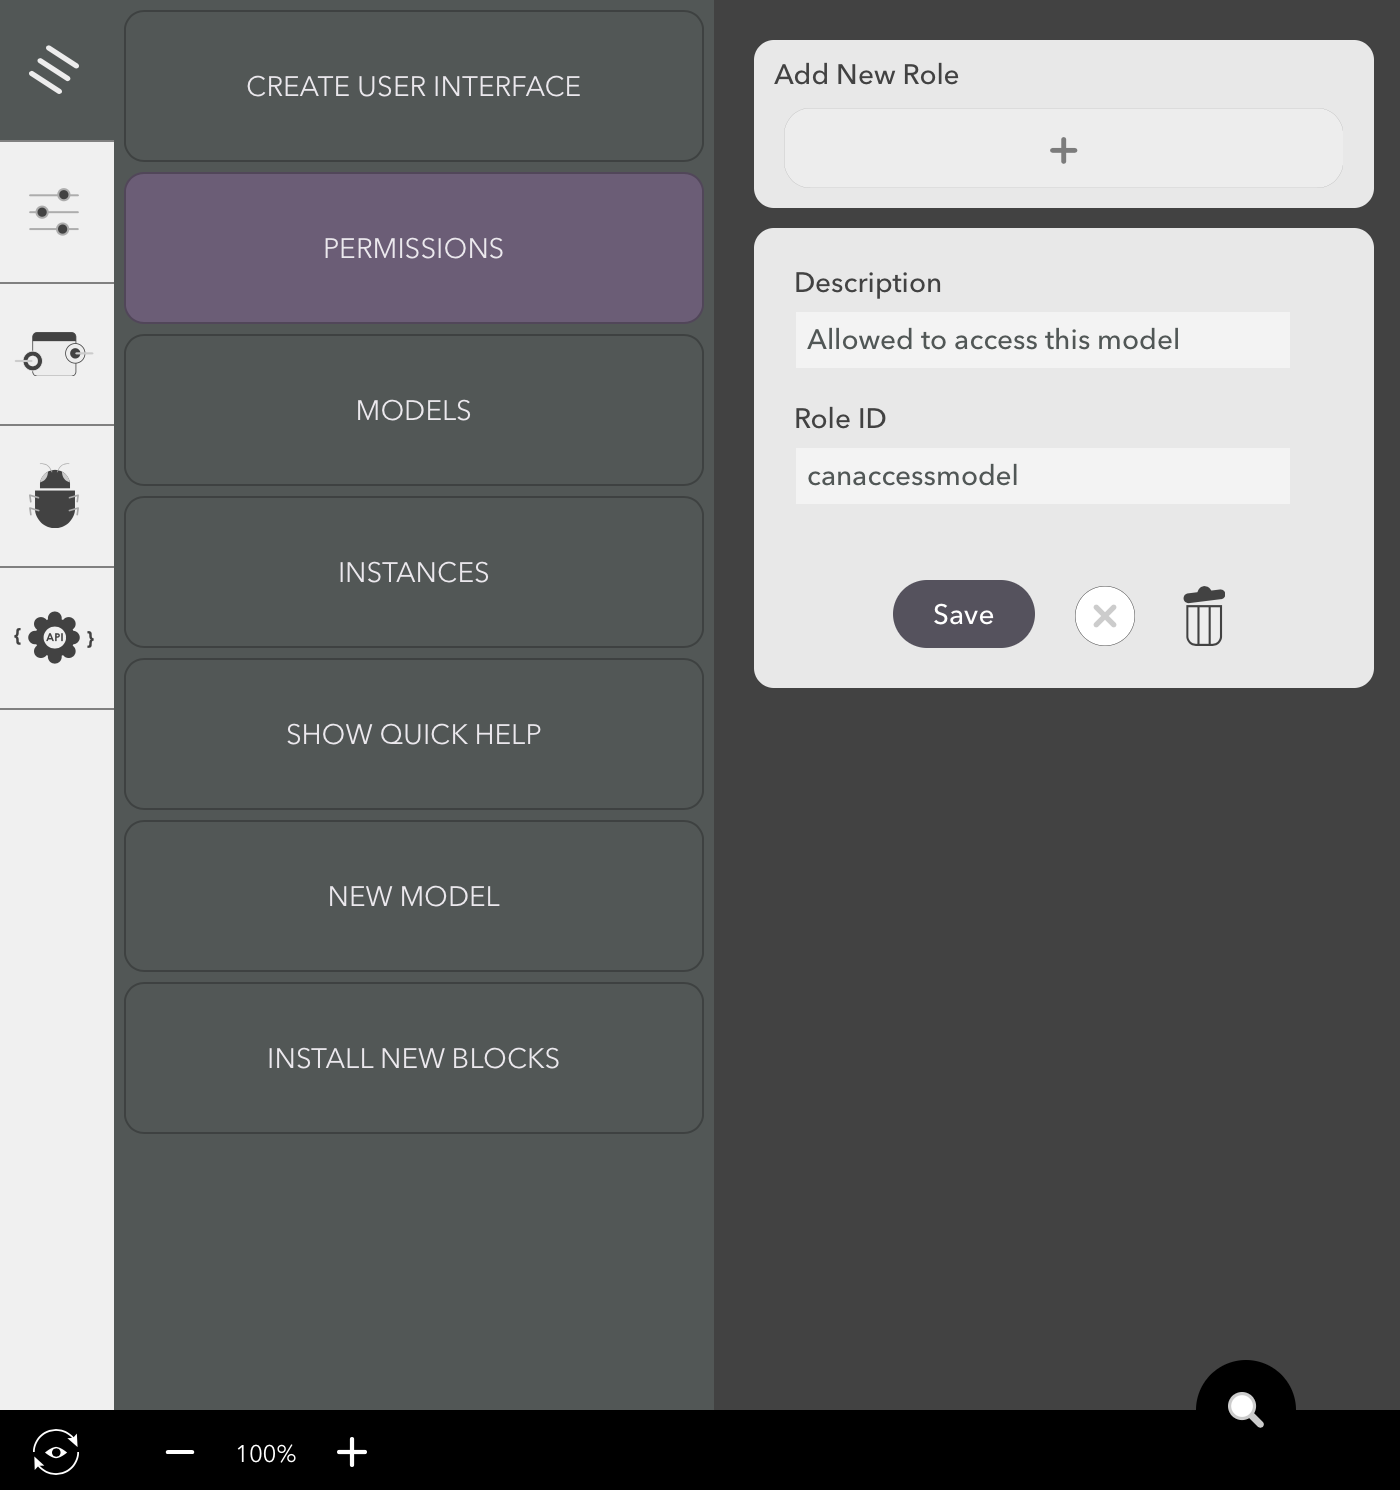
In this section, you can define and view app roles for your model. Application Roles you define here will be available for selection when choosing roles for actions and user interfaces. These roles will also be selectable in the section where User Roles are configured for users.
To add a new role, click the Add New Role button.
A new role will get added to the list.
Click any role to expand it and edit its name and description.
Click the Save button to save your changes. Use the X to cancel your changes. Use the icon to delete the role.
Warning
Lucy internally uses the role names to keep track of permissions. So changing the role name is essentially similar to removing the old role and adding a new one. Only do this if you want to fix a typo in the name you have set. If you have already deployed models that this role is currently in use, do not change the name of the role.
See also